 (D)
(D)
(D)
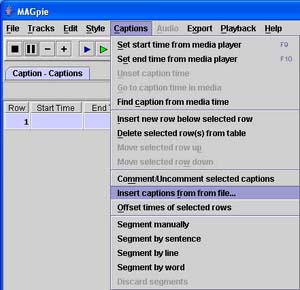
Captioning functions are found under the Captions menu.
As I mentioned earlier, I much prefer working with transcripts rather than typing the captions myself. MAGpie caters for this by allowing you to Insert captions from file.
Selecting this option opens a browsing window to let you choose the text file that contains the transcript.
The transcript should be a plain text file with blank lines separating each caption element. For this project, the file to import is arch.txt. You will notice that the file is imported as new rows in the existing caption table. You will need to remove the empty timeslot at the start by clicking in it and then going to Captions... Delete selected row(s) from the table.
If you wish to use captions from previous SMIL or SAMI projects, it is possible to import these from the Tracks menu. You can also import text files as new tracks from this menu.
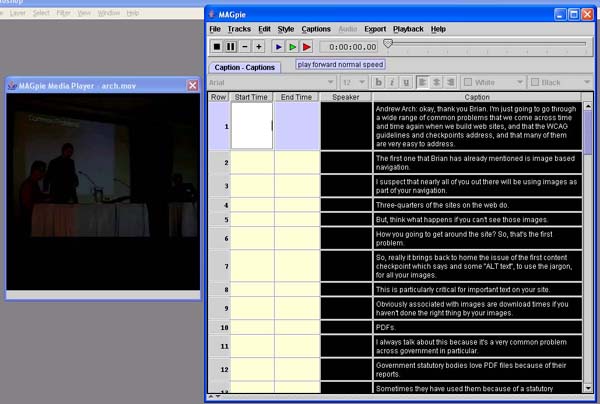 Now
that the captions have been imported, we need to specify Start Times (and perhaps
End Times) for each caption.
Now
that the captions have been imported, we need to specify Start Times (and perhaps
End Times) for each caption.
Start and End Times can be inserted manually, but it is easier to play the video and use the keyboard shortcut (F9) to mark the start of each caption. Each caption automatically replaces the previous, so there is no need to specify an End Time unless there is a long period of silence where you don't want any captions visible. Specifying an End Time removes the caption from the screen at the appropriate time.
If more than one speaker is shown, each segment shuld identify who is speaking. The name of the speaker is added to the Speaker column.
Once you have completed the captioning, you can test it by using the menu options
under playback.
If you wanted to try using some prerecorded audio descriptions, there are two included WAV files, start.wav and intro.wav, that could be added to a new track.
Go to Tracks, and insert an Audio Description. Then go to the Audio menu and select audio file. The first file to use is start.wav. Insert a new row and select the other audio file - intro.wav.
You can then play the video and use F9 to mark the appropriate times to start these descriptions.
Once you have completed adding the timecodes for the audio descriptions, you can test it by using the menu options under playback.
You can also create new audio descriptions by clicking on the Record Description button at the bottom of the audio track window. Give the file a name, record the audio,using a microphone or other audio input device connected to the computer, and save it. The file will be saved to the same directory as the Base Media for the project.
Index | New Project | Project Track | Captions and Audio Descriptions | Testing | Exporting